Glitch effect is retro-techno effect widely used on the design. In this post i am going to show how to create Distortion Effect in Photoshop easily. This effect is similar to the duo tone effect but it looks like an image distortion.
You can also use this effect on images and text.But in this tutorial i’m going to use an image to make a glitch effect.
Table of Contents
#Resources
#1 Open Image on Photoshop
Open a new layer on photoshop (Width:1080px Height:1920px Resolution:72)

Drag and drop your image on the layer and resize your image.

#2 Duplicate Image Layers
Duplicate your image into 3 layers. (Click on the image layer and press Ctrl+J)

#3 Blending Adjustments
Double click on Image 1 and uncheck Blue and Green Channels>Click Ok
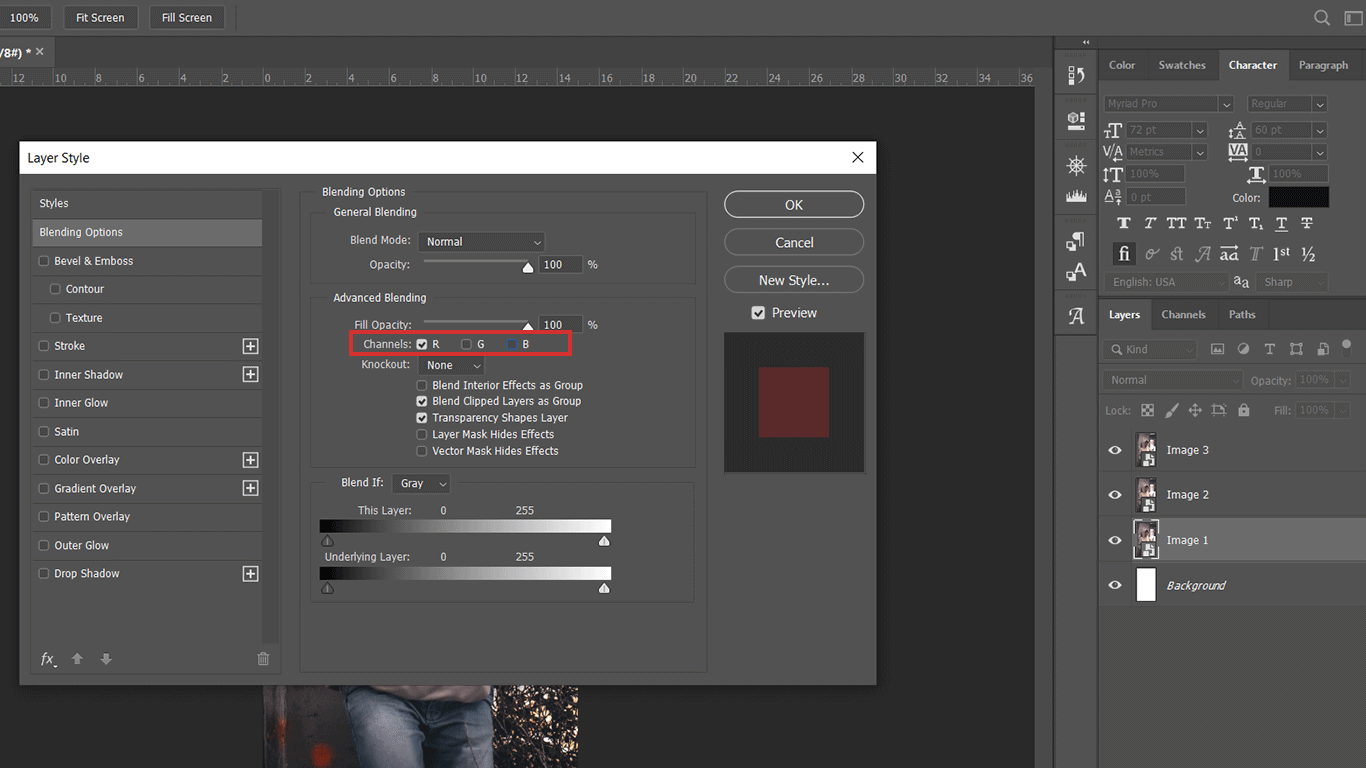
Again double click in Image 2 and uncheck Red Channel>Click Ok

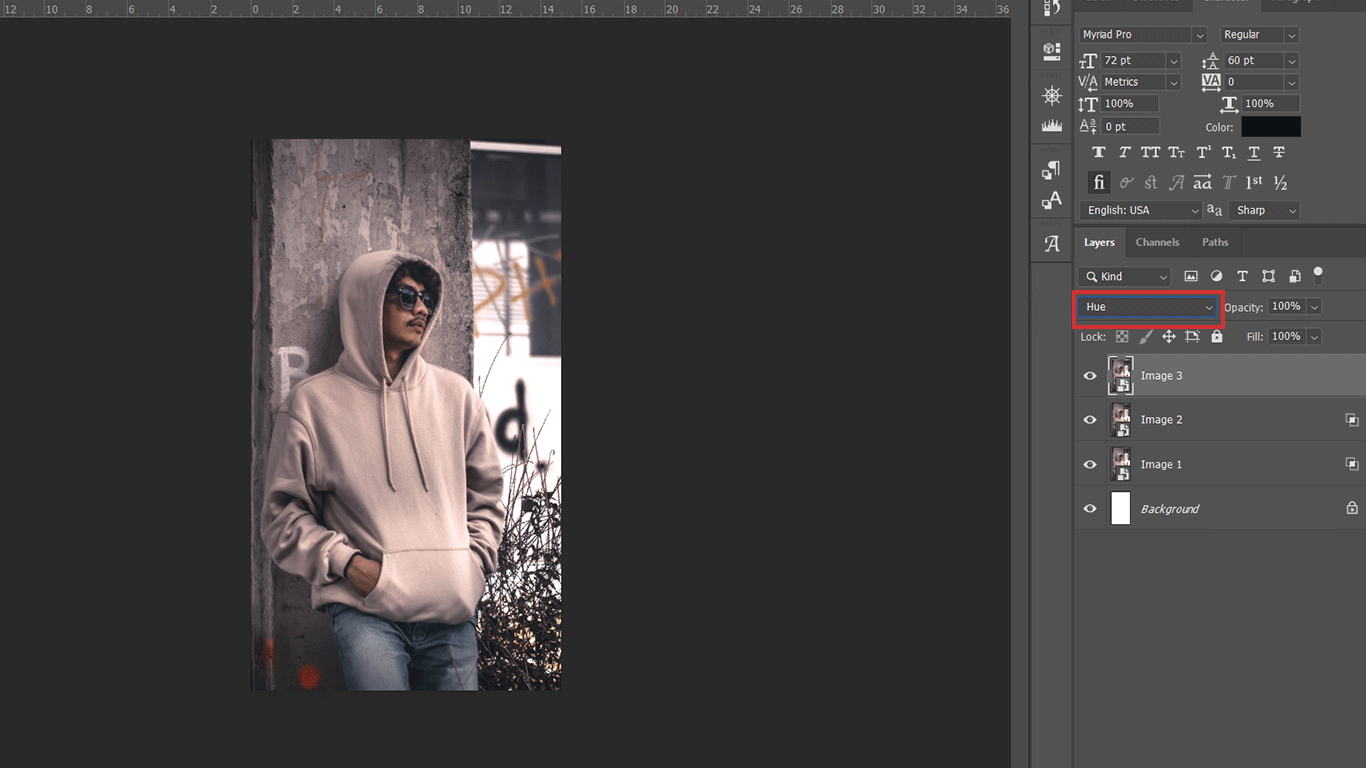
Finally Change the blending Mode of Image 3 to ‘Hue’
#4 Layer Move
Select the Image 2 layer and click move tool on the tool bar. After that Move the image layer little bit for the left using the left arrow key.

#5 Marquee & Move tool
Click an image layer and select the rectangular marquee tool on the toolbar. Draw a rectangular selection of the image.

Now select the moving tool and move the selection a little to the right or left using the arrow keys on the keyboard

Repeat the above step 3,4 times for an image to make a glitch effect.

#6 Scan line overlay
Add a scanned line image above all layers to get a more realistic look.
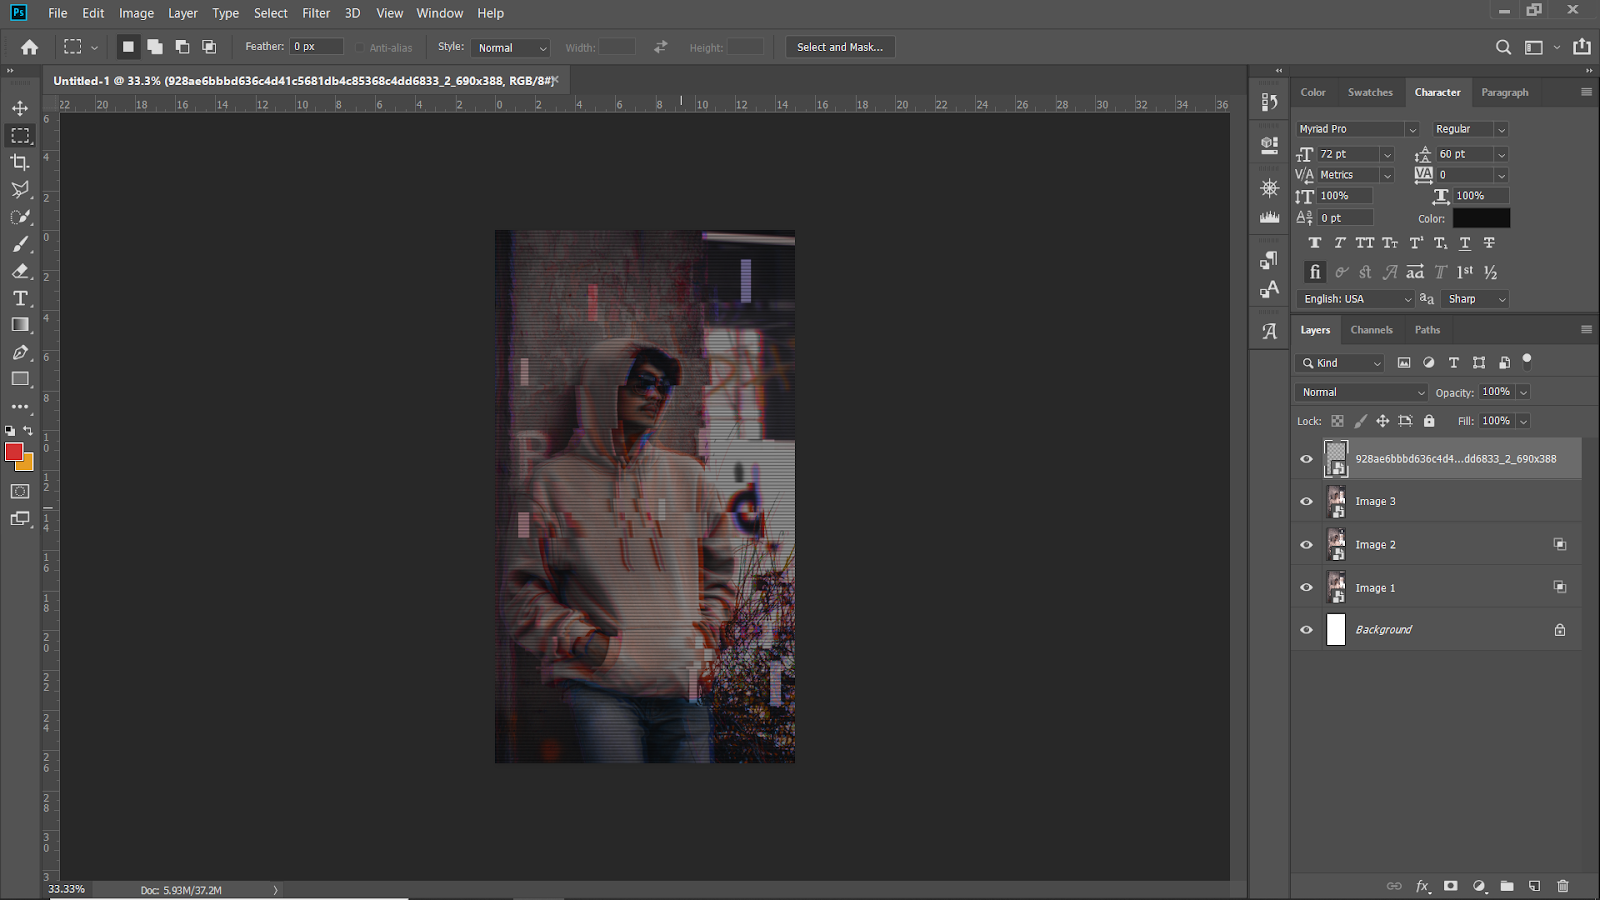
Change blending mode to ‘soft light’

Final-Distortion Effect in Photoshop


Pingback: How to Use Mockup In Photoshop [Free Mockups] - Letroot | We Trust Creativity
Pingback: How to Make Glass Texture in Photoshop [4 steps] - Letroot | We Trust Creativity