Table of Contents
1 Step
Choose a photo and open it on your Photoshop.
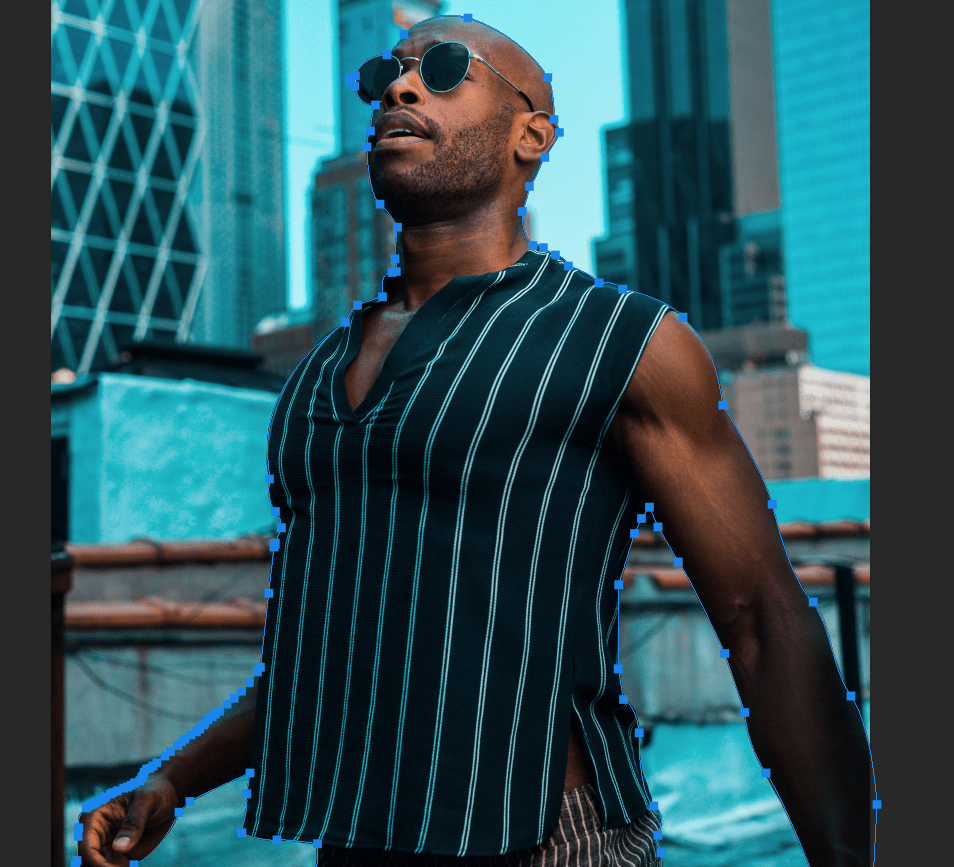
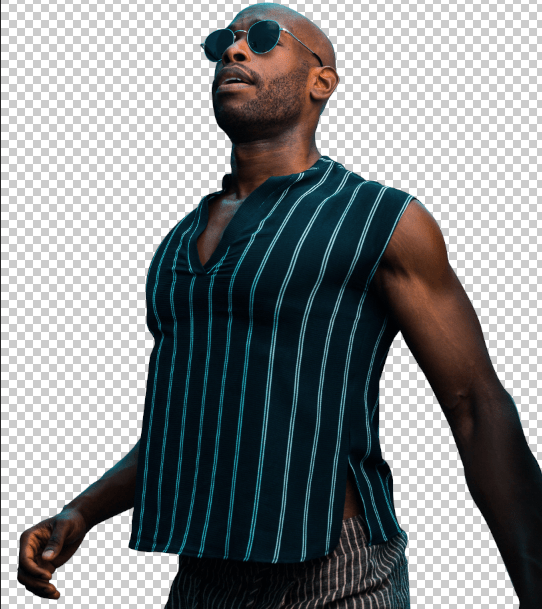
2 Step
Remove the background of your photo using the Pen Tool.
Read: How to Use Pen Tool on Photoshop
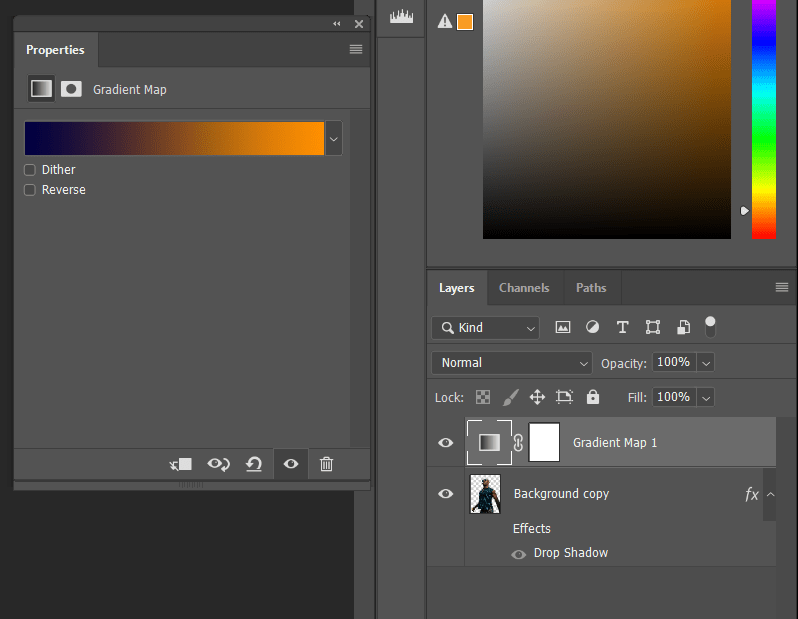
3 Step
Click on ‘Create new adjustment layer’ and select Gradient Map option


4 Step
Choose your gradient colours. (My colours-#010531 and #ff9d1d)
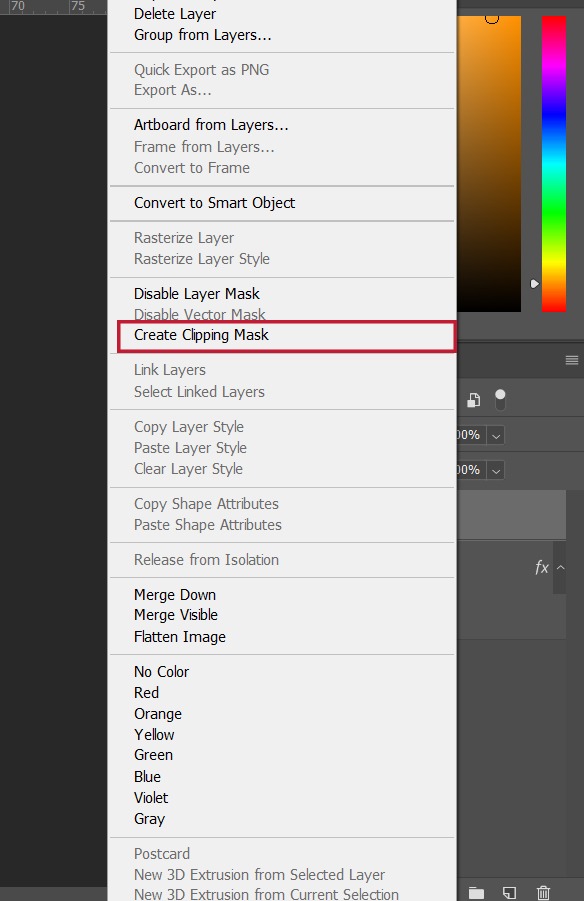
5 Step
Right click on the gradient map select the ‘Create Clipping Mask’
6 Step
Create a new layer and set a background Gradient. I Used #ff8919 and #a05203 for background gradient
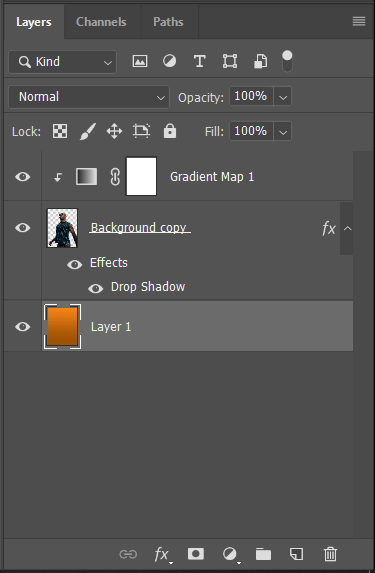
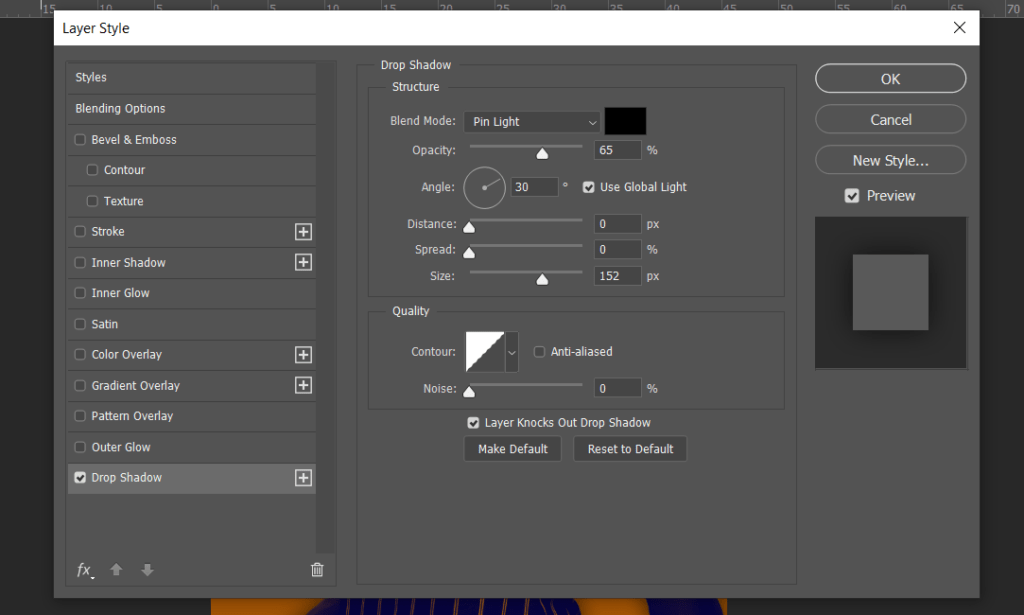
7 Step
Add some drop shadow effect for your object
Final Result


Pingback: How To Make Gradient In Photoshop [Step-by-Step]
Pingback: How to Create Glitch Effect in Photoshop - Letroot | We Trust Creativity